

First things.
The parts for this project were supplied by ModMyPi – so a massive thank you to them! I recommend their site for getting parts for your project, be it Arduino, Raspberry Pi or pretty much anything else you can think of; they always dispatch items quickly and with my stuff I even got a bag of Haribo – which is awesome. Hopefully this is the beginning of a great partnership.
You can also catch this project over at Hackster
Key Goals.
- Make something able to display environmental information to a user (like a HUD).
- Make it wearable.
- Become Iron Man.
Extra Dry, Extra Olives.
- SD Card (16GB)
- Raspberry Pi Zero W
- Enviro pHat
- Powerboost 500c
- LiPoly Battery
- 128×64 OLED x2
- Iron Man mask
- Veroboard
- Male header
- Wires
- Switch
- Push Button
- Lenticular Lenses
- Smartphone Holo Pyramid
- Tie Wraps
- Blutak
- Sugru

Vacation’s Over.
I always have a lot of ideas flying around my head for projects; one of them is to get a toy Iron Man mask and put some hardware in it to make it project information to the wearer, kind of like the holographic interface Mr Stark himself uses. With the upcoming release of Avengers: Infinity War I thought – what better time to make it.
When ModMyPi contacted me and asked if I would like to work with them on a project I immediately sent them the idea and they were kind enough to send me the parts to make it a reality.
It will relay the same environmental information as my PiGlass project, but enabling the user to see in front of them as well as the information on display – which was the weakness of PiGlass project; it obstructed the sight of the world beyond.

Mark II.
With the PiGlass already in my portfolio of projects the majority of the coding and work was already done, the main part was fitting it all into a toy Iron Man mask and getting it to work over 2 OLED screens and also get just the right optics to display the information to the wearer.


The key is the lenticular lenses and the holographic pyramid, the plan is to project the OLED screens text through the lenses and then reflect them off of cut down parts of the pyramid in the eyes, the lenses will focus the text so it is readable close up and the fact the OLED’s have no back light means the only thing visible in the reflection is the text, thus showing the HUD data and enabling the wearer to see through ahead of them still.
For the main wiring of the Powerboost to the Pi see the prior project PiGlass.
Solder up the included headers to the OLED screens, the Enviro pHat and the Pi itself.
We will also need to get an OS onto the SD Card, by far the easiest way to do this is with PiBakery:

You can then write this to the SD Card, pop it in the Pi and switch it on, wait a few minutes and it will eventually shut itself off and be ready to be booted again to work on.
But before the reboot the wiring needs to be done, following the wiring/setup guides for the OLED’s:
Adafruit SSD1306 OLED Display Guide
and for the Enviro pHat:
Now, the two OLED’s and the pHat will all share the same 2 wires for i2c and a wire for GND, so I had to knock up a veroboard with some headers soldered in, so that the OLED’s i2c and the pHats i2c pins can all connect on the same lines:


The 4 sensors on the pHat all have different i2c addresses so that is sorted, the only issue is getting the OLED’s to work in i2c and each have different addresses between them – the way to do this is to solder the 2 pads on the back together to enable i2c, this will enable both to be on i2c address 0x3d.
To get the other one to go to 0x3c you will need to ground pin SA0 on one to ensure it is always pulled low and supply 3.3v to the SA0 pin on the other. There is a 3.3v out pin on each of the OLED’s so its relatively simple to just loop a wire from that to the SA0 pin.
On top of that I hooked up a push button to pins 33/34 which will be used as an off button – I soldered the button onto its own small piece of veroboard and then wired that onto female header wires so that they can be plugged into the pins on the Pi.
With everything hooked up we can boot the Pi and log in – the first thing to do is run:
i2cdetect -y 1
and ensure that all 6 addresses are showing, these should be: 0x3c, 0x3d, 0x49, 0x29, 0x1d and 0x77.
Now run the usual updates:
sudo apt update && sudo apt dist-upgrade -y
Grab the code from Github
The 2 files should be put in:
/home/pi
and then rc.local will need to be edited using the command:
sudo nano /etc/rc.local
where these two lines will need to be added in order to get the code to run on boot:
sudo python /home/pi/ironpi.py &
sudo python /home/pi/off.py &
Now upon rebooting the screens should be displaying the data from the Enviro pHat, check the information is being updated, move the pHat around to see the light levels change and the motion axis change also.
Golden Egg.
Now with the hardware all working correctly its time to put it all into the mask – I had to cut out some of the rubber below the eyes in order to get the screens to project at a decent distance.

You can also see there the lenticular lenses attached to triangles of plastic; these are sides that I had cut off from the holographic pyramid and attached to the lenses at such an angle the OLED’s can display through it and reflect off of the triangles. As seen above you can use Sugru or Blutak for attaching these together, I’d recommend Blutak for getting everything in the right place before using Sugru for a more permanent solution.
The rest of the components I put into the forehead section where there is barely just enough room to put the parts in, without scratching my head – this part its best to cover up any sharp headers with more Blutak or something and make sure they are positioned as far away from the LiPoly as possible so it does not get pierced/damaged.

I have attached the off button to the top right there, so the user can just reach in and tap it to switch off, the Powerboost is situated at the top right, allowing plenty of room to access the battery as well as leave the USB port open for charging.
The pHat itself is situated onto the top right on the outer part of the mask, as the the light/atmosphere sensors on it need to be in the open.
With the lenses and the reflective plastic at the right angle, we should be able to switch the mask on and put it on to see…


There you can see on the left eye:
- Light levels
- R/G/B of light hitting the sensor
- Temperature
- Air Pressure
and on the right eye:
- X, Y, Z velocities
- Degrees to north
Of course it’s rather difficult to capture using a camera – the HUD works fairly well though; but in a future project it will need some tweaking to be better such as:
- Bigger lenses
- Larger/square holographic plastic
- Brighter OLED screens
- Speech rec/voice
As you can see I have had to shorten the descriptions of the information being displayed as it wouldn’t all fit through the small lenses and the plastic – even so the numbers still run off to the sides, but they are very precise numbers and so the numbers further off to the right aren’t critical to see. I could chop these down at some point to make them easier to display.
Also in brighter light the HUD becomes washed out and not visible any more – its possible a brighter OLED would help alleviate this.
Of course the screens can be used to relay any information you want – I am thinking of doing WiFi/Bluetooth information, I could hook into into a GPS or even connect it to my Nerf Gun Ammo Counter / Range Finder project and have it relay information from that.
I was also planning on adding some voice functionality to this at some point; but I wanted to get this initial model out before adding anything more.
I Am Iron Man.
Check out this video where I have attempted to show the mask in use.
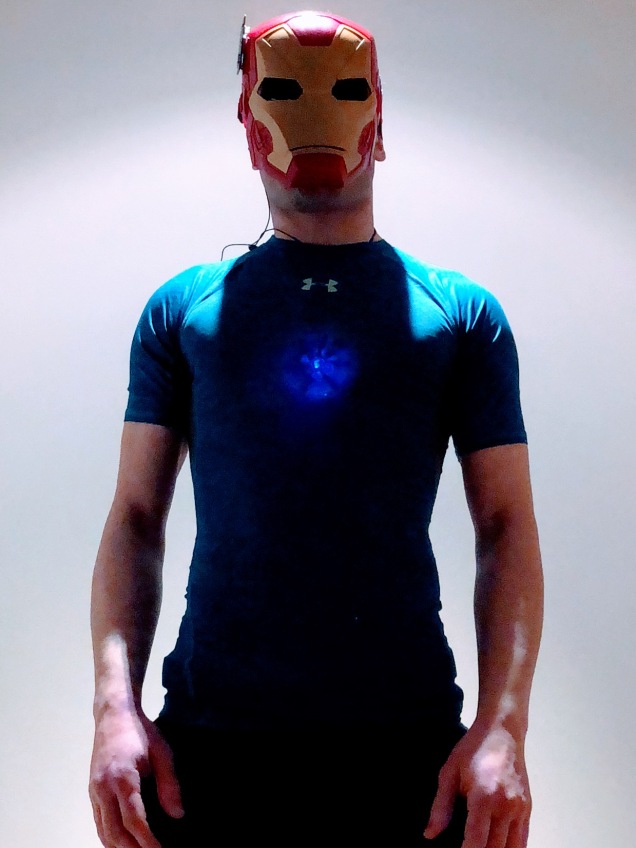
Also here are some photos of me goofing around my flat wearing the mask alongside one of my prior projects the Arc Raspberry MKIII.


Driving With The Top Down.
I do hope you enjoyed this project and it inspired you to work on something similar/improve my design. Feel free to let me know of any improvements I could make or if you have any insights into improving the type of optics I am using here.
Once again thanks to ModMyPi you guys rock!
I’ll see you next time…

